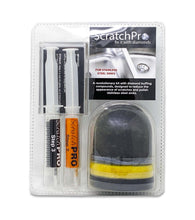
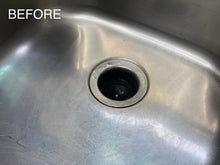
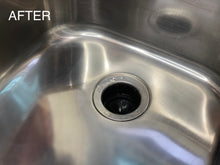
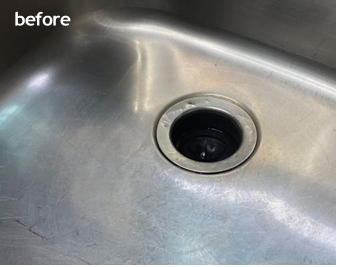
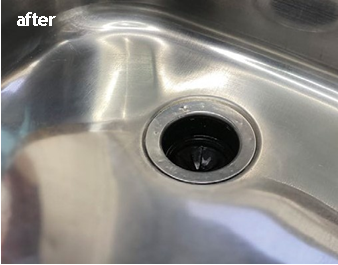
Our Scratch Pro kit for stainless steel sinks is designed to reduce the appearance of ugly scratches and polish your stainless steel sink and make it look like brand new again. With only three steps needed, your sink may look factory-fresh in practically no time.
Perfect for homeowners who love taking on DYI home improvement projects!
Please read all instructions and safety information before use. Failure to do so may result in unsatisfactory results and additional damage.
Scratch Pro® is a revolutionary kit with diamond buffing compound, designed to reduce the appearance of scratches and polish stainless steel surfaces!
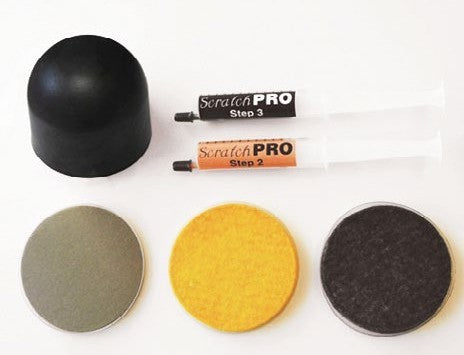
Kit Includes:
- 5 pieces of Scratch Pro sandpaper
- 1 orange Scratch Pro diamond buffing compound syringe
- 1 black Scratch Pro diamond buffing compound syringe
- 1 foam gripper for easy buffing byhand
- 1 orange buffing pad
- 1 black buffing pad
- 2 plastic buffing padprotectors
Please see the back for warning information and disclaimers. Improper use of the kit may result in unsatisfactory results
Application Instructions:
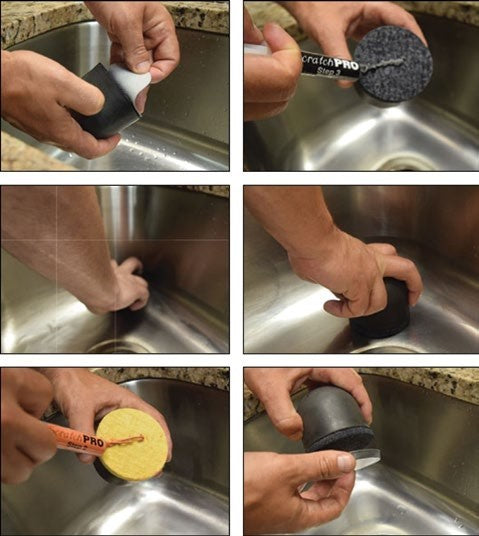
Step 1, Sandpaper - SCRATCH REMOVAL:
Important! Using the Scratch Pro Sandpaper will change
the factory finish, and due to the wide variety of finishes
of stainless steel appliances, it is not recommended to
use this step on large surface areas, such as refrigerator
doors. In most cases, you have to go over the entire
surface in orderto achieve a seamless blend.
Step 1 should be skipped if there are no scratches to
remove, and you simply want to restore shine to the
surface. Begin by cleaning the scratched area well with
a mild cleaning agent. Then, carefully secure a piece of
sandpaper to the foam gripper. Gently buff in the direction
of the grain until the scratches are removed or their visibility
is greatly reduced.This may take several minutes. Clean the
area well before proceeding to step #2, again by using a
mild cleaning agent.
Step 2, Orange - BUFFING:
Carefully secure the Orange pad to the foam gripper and apply at least a 1-2 inch strip of Orange compound #2 to Orange buffing pad #2. Hold the gripper firmly, and buff vigorously in the direction of the grain until the surface appears polished. Clean the area thoroughly of all residue before proceeding to step #3. Failure to completely clean all of the diamond compound #2 may cause scratching during the final step. Remove the orange buffing pad from the gripper and cover the used side with a plastic pad protector before storing.
Step 3, Black - POLISHING:
Carefully secure the Black pad to the foam gripper and apply at least a 1-2 inch strip of Grey compound #3 to Black buffing pad #3. Buff with the polishing compound until the surface is sufficiently blended and polished. Finish by cleaning the area thoroughly of all residue. Remove the black buffing pad from the gripper and cover the used side with a plastic pad protector before storing.
Important Product Information:
- ALWAYS clean the scratched area completely between steps, removing all traces of the previous compound before proceeding.
- ALWAYS apply the compounds in order as marked on the syringes, and ALWAYS use the same buffing compound with its designatedbuffingpad,astheseshouldNEVERbemixedor swapped.
- Whennotinuse,thebuffingpadsshouldalwaysbecoveredby theincludedpadprotectors.Oncea buffingpadhasbeen coatedwithbuffingcompound,itishighlysusceptibleto contaminationby foreignparticles,asthesemaysticktothepad’s surfaceandcausescratching.Neveruseabuffingpadthathasbeendroppedonthefloor,comeintocontactwiththewrong buffingcompound,orcontaminatedbyanyforeignmatterorparticles.
- Store Scratch Pro compounds between 41° and 100° F. It is also important to avoid direct sunlight, as this may cause melting. ALWAYSreplacethesyringecapsafteruseto preventleakage
Caution: Possible skin and eye irritant. The manufacturer’s liability is limited to the replacement of product or refund of purchase price upon return of unused portion of the product. Except where required by law, Superabrasive will not be liable for any loss or damage caused by the product. All statements made by Superabrasive pertaining to Scratch Pro including, but not limited to usage instructions, etc, are based upon tests conducted by Superabrasive and the results achieved thereafter. The user should understand that there are many factors beyond Superabrasive’s control that can affect product performance. Therefore, it is the responsibility of the user to determine whether Scratch Pro is appropriate for the user’s individual needs.


